
Calm down mum, just being punny. There are no metaphorical buns in my oven, but once or twice a week there is a literal loaf of bread birthed from my kitchen. It’s become a new habit I’m proud of to the point of smugness, but the truth is you too could be baking beautiful rustic loaves with a minimum of ingredients, equipment and fuss.
The recipe is by Jim Lahey of New York’s Sullivan Street Bakery, and his no-knead bread recipe caused quite a stir in 2006 when food writer Mark Bittman shared it in the New York Times. You need no more than flour, salt, yeast and water, plus an oven and a heavy pot with a lid. No bread maker, no dough hooks, no kneading necessary. What the recipe does require, though, is time: a slow-rise fermentation of 12-18 hours gives the finished loaf great flavour and requires only a tiny bit of yeast. And the other essential is baking at really high heat, in a covered pot, which makes the dough cook in its own steam forming a perfect crust.
In 2009 Lahey released his book, My Bread, with this basic recipe as the centrepiece and foundation for some gorgeous recipes. Lahey started out as an artist before falling in love with baking, and learning the art of rustic loaves in Italy. I love his no-nonsense approach, at once respectful of the tradition of bread-making and joyfully inventive with new variations. One of my favourite anecdotes from his introduction to My Bread is about how he came to know just how viral his no-knead recipe went after Bittman’s raves in the NY Times. Kitchen supply stores all over New York suddenly reported an unprecedented spike in thefts of handles from La Creuset bakeware. It turns out home bakers were finding their La Creuset handles cracked under the high heat needed to bake Lahey’s bread, so they were resorting to nefarious means of replacement!
If indeed you wish to preserve your own fancy handles, all you really need for this bread is a cast iron pot with a lid. I bought one by American brand Lodge for $40, which is great value considering everything you can use it for. In Australia we often call the same thing a camp oven, or a “mulligan pot” if you’re my dad, and they’re available cheaply at hardware and camping stores. I’ll save my lecture about the beauties of cooking in cast iron for another time!
 But back to you baking your own bread. Maybe you’ve tried before and been turned off by a bad experience. We’re taught to fear baking bread, but you really needn’t be scared. This no-knead bread takes almost no effort; it just takes time. But once you get the hang of the method and a sense for the timing, you’ll start to find it easier to work bread-baking into your weekly routine. Start a dough one evening after dinner – it takes 10 minutes – then the next evening start the second rise when you get home from work. An hour or two later your home will be rich with the smell of baking bread, and you’ll have the inimitable joy of slicing into a crusty loaf you made yourself. Personally it works for me to start the second rise, bike to the park for a run, start the oven pre-heating while I take a shower, then set the bread to bake.
Jim Lahey’s no-knead bread
- 3 cups flour
- 1 ¼ tsp salt
- ¼ tsp yeast
- 1 1/3 cups water
- Wheat bran / corn meal / more flour for dusting
- Whisk the salt and yeast into the flour in a large bowl or your cast iron pot.
- Add the water (it should be around room temperature) and mix together. This should take a minute or so, and you may find (as I often do) that it takes up to 1 ½ cups or even 1 2/3 cups of water to bring it together. The end result should be a sticky dough.
- Cover the bowl and let it be for 12-18 hours, until the dough has doubled in size and is pocked with air bubbles. Leave the bowl in a place that’s not too hot or cold. A warmer environment will see the dough rise faster, in a cold room it will take longer.
- 12-18 hours later, flour a work surface or cutting board. You’ll need a spatula or bench scraper to get the sticky dough out of your bowl. It should have a surface pocked with air bubbles and you’ll see it stretching in little strings – that’s the developed gluten. Turn out the dough onto the floured surface and make four folds of the corners into the middle, shaping it into a roundish ball. You may find the dough is runny, but it should still be fine!
- Spread out a cotton cloth or tea towel (not terry-towel, a smooth linen or similar that won’t leave fuzz stuck to the dough) and dust it well with bran or flour. Place your ball of dough on it, seam side down, and fold up it up in the cloth.
- Let your dough rest for its second rise for 1-2 hours. You’ll know it’s done when it’s grown and if you poke it, it will hold the impression of your finger. If the dough springs back, let it rest another 15 minutes.
- The oven needs to get really hot so start it preheating when you’ve got about half an hour of your second rise left (or after 45 minutes) – set the oven to 500F (260C) and get your pot in there warming up.
- Carefully take out the hot pot (it’s seriously hot) and as deftly as you can, turn out your dough from the cloth into the pot. It will land in there seam side up and hopefully centred in the bottom and not stuck to the side! But even if it’s a bit wonky, it will be fine. Pop the lid on and cook at 500F for half an hour.
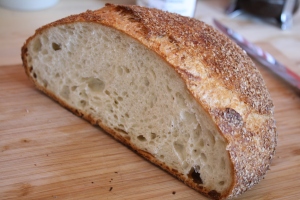
- After 30 minutes remove the lid and admire the beautiful shape of your loaf! Now it’s time for it to brown. Continue baking without the lid for 15-30 minutes, until the crust is a nice, deep chestnut brown.
- It’s going to be tough, given the aromas now wafting through your home, but you need to let the bread cool for a good hour before slicing into it. Just trust me, ok?

The other thing I love about this recipe is its unfuckupability. I’ve made this bread dozens of times now and every now and then I’ll have a brain snap and make a mistake – forget to preheat the pot, totally smoosh the dough unevenly into the pot, add a little too much water. No matter what, we’ve never been disappointed with a loaf; it always comes out of the oven looking fine.
I’d suggest trying this for the first time over a quiet weekend. After making it a couple of times you’ll have the recipe committed to memory, and it will become second nature to start a dough the day before you’re having friends for dinner or a weekend brunch. They might just hate you a little when you say “sure, I baked it myself, it was nothing!”
